Search This Blog

Showing posts with label classroom guidance. Show all posts

Tuesday, June 24, 2014

Student Mentor Program

I have recently designed a new program that I am excited about implementing! It's a Student Mentor Program, in which carefully selected older and more responsible students are trained to mentor younger students who may be struggling with social, academic, or behavioral concerns. Similar to "Peer Mediators" or "Peer Helpers", the Student Mentors will help the counselor reach even more students and create a lasting impact on  the school environment.

Who??
The program would work great with elementary or middle school, but could also easily be adapted to high school. Alternatively, if you have different level schools nearby, arrange it to have high school students mentor middle school students.

Mentors would be responsible role model students who apply (and interview!) for the position of mentor. They would meet regularly with the School Counselor for quick individual check-ins and for after school group trainings. They will be taught how to help younger students manage conflicts, handle strong emotions, and provide general encouragement and friendship.

Mentees would be students who are "frequent flyers" in the counselor's and/or pricipal's office. The may need additional support outside of what the caring adults in the school can provide. An example of the ideal mentee is one who is constantly asking to speak to the school counselor about little problems, or one who is trying to fit in with their peers. To these students, their mentor will be an older friend who they get to hang out with and talk to once a week.

What?
Student mentors will be trained in being a mentor. They will receive explicit instruction on how to encourage and lead a younger student, and how to help with many problems that they face. In a way, mentors will be "Counselor Helpers" or "Peer Helpers". When the counselor's schedule is packed (like it always is), student mentors can help younger students with some of the small problems that they face, while becoming expert problem solvers themselves!

When and where?
I see this being a year-long program. Mentors should meet with their mentee once per week for 20-30 minutes, during non-instructional time. Training would take place at least once per month after school, when all mentors are able to attend. Mentors would also check in periodically with the counselor (5-10 minutes, before or after school) so that the counselor can monitor their progress and answer any questions they have.

Why?
Let's face it- School Counselors are BUSY!! This mentor program is a way that you as a school counselor can impact even more students. You teach mentors how to help, and start the snowball effect of students helping students. Soon enough, your entire school will feel the impact! There have been many studies done about the effects of mentoring on student achievement, but unfortunately there is a lack of willing {adult} mentors in our community. But who says mentors can't be children too?

 
(Get this poster FREE here)

Suggested steps to implement program:
  1. .    Inform teachers of the mentoring program at a staff meeting. Explain the potential benefits for mentors and for mentees, and how it will impact the school as a whole.
  2. .    Class introduction lesson. Meet with classes of older students to discuss the mentoring program. Emphasize the amount of responsibility and dedication that being a mentor will require. Leave information and copies of the Mentor Application with teacher. Teacher will give applications to students who are interested, as well as the parent information sheet. (Another possible route is to open the applications up to your student council or other student leadership groups, or simply ask teacher for recommendations and ask those specific students if they are interested)
  3. .    Once students turn in complete applications, meet with those students individually or in a small group (lunch bunch). Discuss overall objective of the program, specific requirements, and answer any questions they may have.
  4. .    Meet with possible mentees, explaining what their mentor will be doing with them. Give mentees pre-assessment. Mentees should be students in younger grades who need additional support, but do not typically have big problems or concerns. Check with parents of mentees before initiating mentoring.
  5. .    Schedule after-school training session to go over additional details of the program. (See list below of suggested training items) Give out pre-assessments to all mentors.
  6. .    Pair up mentors with mentees.
  7. .    Meet regularly with mentors to discuss progress (before school check-ins or during lunch) 

Suggested Trainings: At each training, include a handout for students to keep in their notebook for reference. I would suggest doing an interactive notes style handout to further engage the students.
  •       What specifically is expected of mentors (What is a mentor? How can I help?)
  •       How to conduct a peer mediation session
  •       Promoting empathy and kindness in others
  •       Strategies for handling anger, sadness, stress
  •       Strategies for solving "small problems"
  •       What is effective communication?
  •       What to do if… (reporting "big" problems, what if you're not sure what to say?, etc)

Other fun mentor program ideas
  •       Have a "Mentor Night" or "Mentor Fair" at the end of the school year where student mentors present information on their impact with younger students. Have students create trifold poster with what they have learned from the program, how they helped their mentees, and the overall impact of the mentoring program on the school. For maximum participation, hold the event during a PTA night or in conjunction with other big school events (talent show, science fair, etc)
  •       Create matching T-shirts or bags for mentees (Vistaprint!)
  •       Give out certificates for participation in the Mentor program at Honor Roll ceremony.


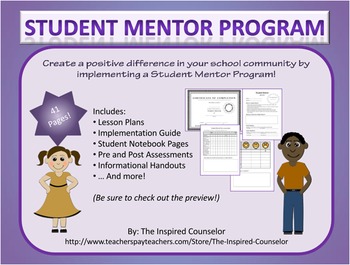
If you are interested in starting a Student Mentoring Program at your school, check out my Student Mentor Program Pack on Teachers Pay Teachers! It includes information sheets, application, Mentor Notebook pages, assessments, and four training lessons. 
Student Mentor Program

Finally, if you have started a Student Mentoring Program at your school, I'd love to hear how it is going and any suggestions that you have for the program!

Thursday, August 22, 2013

Origami Group

After learning about how to make Never Ending Cards, I started thinking about what kids could learn from folding paper. Turns out there is quite a bit that can be learned by making a few folds in a sheet of paper! Below are just a few of the benefits that students would gain from learning Origami.

Academic
  • Shapes (Identifying basic shapes, new shapes made from folding)
  • Symmetry (Much of Origami is symmetric)
  • Angles (You had a right angle, but folded it in half. Now how many degrees is the angle?)
  • Fractions (You just folded this paper in half three times. How many sections do you have?)
  • Following Directions (Some instructions for making Origami can be very specific and detailed.) 
  • Reading with a purpose (For an added challenge, only provide step-by-step instructions and no pictures)
Personal/Social
  • Teaches patience and concentration through attention to detail
  • Teaches perseverence- if they get frustrated with a project, keep trying
  • Making mistakes is a part of the learning process
  • Problem Solving skills- How can you fix your mistakes/ "happy accidents"
  • Gives students a positive hobby/ skill that can be shared with others
  • Gives an outlet for ADHD energy and fiddling
  • Kids can share their hobby through making gifts for others (encourage Random Acts of Kindness!!)
Career
  • Learning how to create a 3D object out of a flat sheet of paper = foundation of Science, Technology, Engineering and Math (STEM)
  • Students learn to pick up on and apply patterns from folding to other subjects and careers 
Origami Group
I have not yet run an origami group, but it's definitely on my list of groups I'd like to run! I would gear it to 3rd grade and up. Each week, we would focus on a different topic such as having patience, making mistakes, following directions, etc. I would also have them create at least one project each week. I might even throw a challenge at them to deconstruct and recreate a completed origami project. They could make origami to sell as a school fundraiser, or lead a school wide service project making origami for Sandy Hook.

Classroom Guidance Lesson

Using the book, Spread Your Wings and Fly by Mary Saunders, have students fold along with the story in the book as you read. Here is the book description from Amazon.com: An Origami Fold and Tell...the ancient Japanese art of origami provides a framework for enhancing self-esteem and achieving spiritual attunement that will stay with readers as they work through the book, as well as the various phases of their lives.

Sadako and the Thousand Paper Cranes: Here is the book description from amazon: Born in Hiroshima in 1943, Sadako was the star of her school's running team, until the dizzy spells started and she was forced to face the hardest race of her life-the race against time.

Empowering Kids 
I would like to leave you with one final note- a direct quote from an article on Enso Journey: The Power of Origami: How it can make you a better person: (I definitely encourage you to read this article!)

"I created something out of nothing. From a simple piece of paper, a new creature was born. For each new piece I made, I felt I had the power to change the world. I could do anything, even if I had nothing to begin with, I could do it."

Monday, May 6, 2013

Technology for School Counselors

We are living in a technology-infused world. For the counselors and educators out there who have embraced the many benefits of using technology in the schools, the possibilities are truly endless!
Below are just a few of the possible ways that school counselors can use technology to make their school counseling program more efficient and more beneficial for the entire school! 


Counselor Organization
  • Google calendar- scheduling at a glance
  • Google docs- surveys and forms, share documents, spreadsheets
  • Individual Notes- (careful to ensure student confidentiality!)
  • Keep track of parent contacts
  • create charts and graphs for accountability 
  • Dropbox- Instead of filing cabinets full of papers, keep resources at the click of a button!

Individual/Group counseling

Classroom Guidance

School-wide

Other

Saturday, April 27, 2013

End of the Year Closure Lessons

This week was very bitter sweet for me, though more sweet than bitter! I have now finished my school counseling internship and will be graduating in just two weeks! This week consisted of tying up some loose ends with individual students and saying my good-byes to groups and classes. Below are some of the closing/termination activities that I did with my students, and some that I didn't do but wanted to share anyways. I hope you enjoy!

Individual

  • Paper Finger Puppets- Found on the blog Seven Thirty Three, I taught some of my younger students how to make these very simple puppets. A lot of my individual work with the younger students has involved puppets. As a final individual session, we both made a paper finger puppet and used it to say goodbye. The students absolutely LOVED it! And it gave them something to take with them to remind them of our time together. 
  • Writing notes- Before I left for the year, I wrote several of the students personalized notes emphasizing their growth over the school year, and included some empowering words to encourage them to continue to work towards their goals. 
  • Bridge- Have the student draw a bridge in the middle of a sheet of paper. One one side is where the student used to be, and on the other is where he is now. Under the bridge- what obstacles did you have to overcome? This can also be done with two bridges, with the last one being where you would like to be, and what obstacles you might have to overcome to get there. This activity can be used at the beginning of counseling as well to give direction to the sessions. 
  • Letters to the past/future you-Have the student write a letter to him/herself in the past or the future. If you could time travel to the past/future what would you tell yourself?
  • Lines of Feelings. Ask the student to draw a line that represents their feelings over the past (year, month, week, etc). All of the lines will vary, but usually the jagged or rough lines in red or orange are used to signify anger or discontent, and the smooth, flowing lines in blues and greens are usually used to show calmness and contentment. After the lines are drawn, the student can expand on them by writing about what the lines represent, how it feels to draw them, or to whom or what they are directed.  

Groups
  • Flower Petals- The flower represents the group growing over time. A flower starts as a bud, and you can not see the petals yet. But over time, with water and sun, the petals begin to unfold, creating a beautiful flower. Place a circle in the center of the group, and tell them that this represents the bud, before group began. There were many things that you know now that you didnt know before. Give each student a paper flower petal, and say one thing that they have learned from the group. Have the student symbolically tape the flower petal to the circle. Continue until everyone has done this. 
  • String tying- From Diane Senn's book Creative Approaches to Counseling Individual Children. I used this at the end of my fourth grade girls friendship group to help remind the girls that it is okay to ask for help when they have problems, and that your friends are often a great source of help. Start by giving each girl a string that is at least one foot long. Tell them to tie a knot in a string. This is pretty simple for them to do. Some problems are easy to handle yourself. Then, instruct them to hold both ends of the string without letting go and tie a knot. Tell them that it is okay to ask for help. After letting them try for a few minutes, ask them if they would like some help. Ask one student to cross her arms, then hand her the ends of the string in each of her hands. Have her unfold her arms without letting go of the string, and a knot will be tied in the string. Allow the girls to help one another with this. Tell the girls that sometimes we have problems that we are not sure how to fix, and it is okay to ask someone else for help, and sometimes it takes a creative solution to solve their problems. Friends help us get through some of the tough problems we have, but when friends cant help, your school counselor is still there for you. 
  • Choose a Picture- Print out a variety of different pictures, such as animals, scenery, symbolic pictures, people, etc that represent a variety of emotions and different points of view- both positive and negative. Lay the pictures out on the floor and ask students to choose the picture that shows how they feel, what they will take away from the experience/group. Process what the picture chosen means to each individual. This site does a great job of explaining this method of closure. 
  • Group Puzzle/Mandala- Give each student a piece of the puzzle or a piece of the mandala and let each student decorate it. At the end, let each student symbolically place their puzzle piece or mandala piece back into the puzzle, saying one thing that they have enjoyed or have learned during the group. Allow students to keep the finished product in their class to remember the good times together.
Classroom
  • The Giving Tree- I wanted to incorporate a finger-print tree into the lesson somehow, and my supervisor suggested I use the The Giving Tree with it. That got my wheels turning! I used the book with first grade and up, adjusting the lesson slightly to accommodate for developmental differences. Before reading the book, I asked the students to be thinking about who they can relate to more- the tree or the boy. I then read the book to the class without stopping for inserting my own interpretation of what was going on. After I read the book, I asked them again who thinks they are more like the tree or more like the boy. In most classes it was about half and half. I let a few students explain why they thought they were more like one or the other. Then I told them that sometimes I feel like both. I feel like the tree because as a counselor, I will gladly give my students anything and everything that I have to help them when they need it. But at times, I have felt like the boy, and the students were the tree. In the same way that the boy got what he needed every time he asked for it, I got what I needed to become a school counselor from the students. I told them that they have taught me so much more than I have taught them this year, and thanked them for helping me learn how to be a school counselor. At the end of the lesson, I let each student come up and put a finger print on the tree, using a washable marker. (In later classes I decided to just have them write their names on the branches in different colors). I then wrote a note to the class and gave it back to them to keep in their classroom to remember our time together, and to remember that it's okay to be like the tree AND like the boy. 
  • Toss 'n Talk ball- For some classes, the students had many questions for me about why I am leaving and what I would be doing after I'm gone. After answering a few questions, I got out a inflatable ball and asked students what their favorite memory with me was this year, in 2-3 words. I used the ball as a talking tool- only the person who has the ball can talk. I gave each student a turn to catch the ball and say a favorite memory. 
  • Class Rap- I did not do this one, but it was my back up. The students are finishing up a poetry unit, so to incorporate this, I was going to have the students write a haiku about what they will take away from our time together this year. After they wrote the poems, we would all sit in a circle. Depending on the age and ability, I would divide the class into 2-4 groups, and give each group a rhythm to clap to a given beat, and maybe even having a student being our "beatboxer" to be our percussion. Then one at a time, students would read their poems in rhythm with the class's beat. 
  • Empowering Words- Adapted from Kellybear.com-  Close the year out with some positive and encouraging words! Have students think about some thoughts that help them feel better when they are feeling sad.This is called positive self-talk. Brainstorm thoughts that can help on the board. After the class is brainstormed out, have them choose one statement that is meaningful to them and draw a picture about it. Allow time to share. Remind kids that even though they may feel sad about things (such as a teacher/counselor intern leaving them, or something else sad), they have the power to control their thoughts and can think about these things to make them feel better. Leave with encouraging words challenging them to be their best! (These positive self-statements could make a nice end-of-year bulletin board!)
  • Paper Quilt- have each student draw their favorite memory from the year on a square sheet of paper. Tape the pictures together, or put into a gallon-bag quilt format to display, like the one here


Sunday, April 21, 2013

Career Exploration Lessons- Webquest

This month we have been focusing on careers. I wanted to do some type of self-exploration activity with the students where they learn a bit about themselves and find careers that match their interests/personality. Initially, I was hoping to find a webquest of sorts for the students to explore, but was not able to find anything age appropriate that I liked. There were a few great websites, but none that had everything I was wanting to cover. Instead, I decided to create my own mini-webquest. I have included powerpoint presentations that I have created, as well as a worksheet to go along with the websites. All of the links are listed below. I hope that other school counselors will be able to use some of these resources to help your students explore careers!

Lesson 1: Introduction to Careers- why people choose career (30-45 minutes)
PowerPoint Presentation

On day one talking about careers, we discussed the definition of a "cluster" (relating it back to the career clusters), discussed why adults work, and how they choose their jobs. The students then created a story by entering a few words about what they like or enjoy doing, using this site. Below is a sample story made by this site! There is also a printable story where students just write in the words.
 Lesson 2: Career Exploration (45-60 min.)

Each student received a worksheet to guide them through this "webquest". As a review of the previous lesson about choosing careers based on interests and personality, the students started by learning their "Holland Code" by using this quick assessment from GetReadyforCollege.org. In this assessment, students simply check the box next to the things that interest them. Once they submit, they are given a score for each of the 6 Holland Codes. After students have learned what their Holland Code is, we discussed as a class what each one meant, and what kinds of careers people with those personalities would typically like. 

Next, students searched using Paws In Jobland for jobs related to their interests. They were to choose three jobs that are most interesting to them, and write down why they would be a good fit for those jobs, based on interests/personalities. 

Once a teacher verified that they had completed the search site, they could go to VA Career View to explore more careers through games and activities.  


Career Links:
Lesson 1:
Lesson 2:


Friday, March 29, 2013

Name Calling and Compliments Lesson

I did another lesson with first and second graders about the power of their words. We had discussed during the last class that words have the power to build someone up or tear someone down, depending on how you use them. This lesson helps to tie everything together, and provides a little extra help with how to compliment others and also how to receive a compliment.

Materials Needed:
Ball of yarn
Two sheets of paper (or space to write a T-chart)
Marker
(Scissors)
Class sitting in a circle

Introduction
To begin this lesson, I had each of the students share how they got their name (named after someone else, a place, a thing, for the meaning of their name, etc). I explained that your name is very important because that is the first thing that anyone learns about you when they first meet you. "Hello- my name is ___. What is your name?" If names are so important, how might it make you feel if someone started calling you by the wrong name? What about if someone calls another person ugly? This is what we call "name calling", or a put-down.

Brainstorm!
We then created two charts- one with "name calling/ put-down" and the other with "compliments/ put-ups". We brainstormed words and phrases for both categories, and talked about how it would make someone feel to be called one of the things from the list.  I reminded students that words have the power to build someone up or to tear them down. Everyone agreed that they would like to be called something from the compliment list.

Compliment Web
Using the ball of yarn, we created a web of compliments in the classroom. I started it off by wrapping my finger around the end of the yarn one time, showing the class what is expected. I then complimented one student in the class and rolled the ball to that student. The student responds by saying "thank you" , wrapping their finger around the yarn, then saying a compliment to another student in the class, so on and so forth until every student has received the yarn and a compliment. This helps students not only learn how to give compliments, but what to do when they receive compliments as well.

Tying It All Together
As a class, we talked about how good it made everyone feel to receive a compliment. I pointed out the fact that people who were across the circle from one another were could feel the string move every time another person pulled on the string. In the same way, when we hear one person giving another person a compliment, that also makes us feel good. Compliments are contagious! Before I left the class, I cut off a piece of the yarn for the teacher to keep in the classroom as a reminder to give people compliments instead of calling them names.

Saturday, March 23, 2013

The Power of Words Name Calling and Compliments Lesson


During first and second grade classroom guidance this week, we talked about  how powerful words are. Words can either tear a person down or build them up. They can make a person feel really sad or angry, or can make them feel happy or proud.

Introduction:
I introduced this topic by writing the following phrase on the board: "Sticks and stones may break my bones, but words can never hurt me." We discussed whether or not this was a true statement. If someone hit me in the arm with a stick, would that leave a mark? If someone threw a rock and hit me in the leg, would that leave a bruise? What if someone said something really mean to me? What would that hurt? Sticks and stones may physically hurt your body- leave bruises or scratches, but words hurt a different part of your body- your heart/feelings.

Video:
We watched a short video about someone who got called names, and then talked about how it makes people feel to be called names, and we discussed what they did in the video to make things better between them. We then reviewed how powerful words can be when used to either build someone up or tear them down.  

Class Activity:
For the activity, I wanted the students to practice using their words to build others up- by using compliments. I taped a sheet of paper to every kid’s back with their name on it, and instructed the class to write something positive about each person in the class. Afterwards, I collected each of their sheets of paper- (before they looked at it so that I could read over them to make sure everyone wrote kind things).

Closure:
As the students left, I gave the papers back for them to take home and to remember how powerful their words can be.  How did the compliments make you feel? Was this easy or hard to come up with compliments for everyone? Knowing what we learned about the power of your words, what will you try to do differently this week? Many of the students were very excited to have all of the nice things said about them during today's lesson! 


Tuesday, March 5, 2013

Butterfly Diversity PK/K Lesson


File:Monarch Butterfly Danaus plexippus on Echinacea purpurea 2800px.jpgIntroduction:
Did you know that there are no two butterflies that are exactly alike? Even if they look the same, there are still very small differences. To begin this lesson, we compared pictures of different butterflies, comparing how they are similar and how they are different. The question was posed: is one butterfly better or more special than the other because of the design on it's wings? How are you like these butterflies? 

Activity:
Pass out crayons and paper butterflies for students to decorate (link for butterfly template is at bottom of page). I encouraged them to be as unique are they are and add as many colors as they would like. I also showed them how to make the butterflies "fly" without leaving their hands, which the students LOVED! Make sure to allow time for students to share their artwork at the end of the lesson!

Song:
There is also a really cute poem that goes along with this lesson. This is a great way of getting the students to come back together after having a few minutes to color their butterflies. I changed it up just a bit to make it fit with a tune to a popular song- I'm a Little Teapot. (This is NOT my original poem, but I can not recall who to give credit to! 

I am very special I am neat (hug self)
From the top of my head to the bottom of my feet (hands on head, hands on feet)
We are all unique and that's okay (palms up, sweeping from left to right to "include class")
We're all like the butterflies (make butterfly out of hands, or make paper butterfly "fly")


Saturday, February 16, 2013

Simon's Hook: A Story About Teases and Put-Downs Lesson Plan Ideas

With the third graders, I did a unit on Simon's Hook. There is so much that can be done with the book! Simon's hook is a story about how to deal with teasing and put-downs. When Simon has a bad hair day and someone calls him a name, he gets very upset. Grandma Rose then tells Simon a story about how to handle teases and put-downs, from a fish's perspective. When someone teases you, they are throwing you the hook. When you get upset, you are biting onto their hook. Grandma Rose helps Simon learn how to "swim free" from the teasing hooks that people toss his way.


Youtube Videos

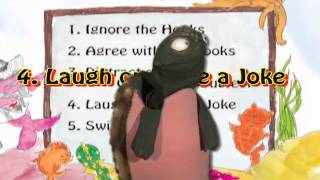
Grandma Rose's Neighborhood Youtube Videos: As a review of the book, or even in place of the book, show these videos to the class. Part one has the intro about how teasing is "throwing a hook". Part two is the story about how the fish learned to swim around the hooks instead of biting. Part three shows some role plays about handling teasing.
Thumbnail
Grandma Rose's Neighborhood Part 1
Thumbnail
Grandma Rose's Neighborhood Part 2

Thumbnail
Grandma Rose's Neighborhood Part 3

Which Strategy is it?

After discussing the strategies of how to avoid biting the hook, we played a little class game. I wrote each of the five strategies on the board. After another student reads the scenario, the class would show me with their hands which number they think the scenario is an example of. Below are the scenarios that I used.

Ignore
The whole class is about to play kickball. Sam says to the Dustin, “We’re gonna beat you guys!”. Dustin looks at Sam and shrugs, thinking to himself, “I really don’t care if they win”

Amy and Sara are playing checkers when Matt approaches them and says to Sara “Your mom is fat”. Amy and Sara continue to play checkers as if nothing had happened.

Agree
Patrick is telling a joke to his friends. “Knock knock!” (who’s there?) “Interrupting Cow!” (interrupting Co-) “MOO!!!”. Chris looks at Patrick without laughing and says- that was a dumb joke. Patrick says “yeah, it sure was!”

Distract
While playing dodgeball, George says “Ha ha you missed me!”. John responds by saying “what I really miss is my X-box. Man I would love to be at home playing that now!”

Laugh/joke
Josh just got finished telling a story to his friends about embarrassing himself this weekend with his family. When he was finished,  Jason said, “wow. Really? How dumb can you honestly be to think that would work!” Josh responds by saying “well, you’d be surprised just how dumb I can be sometimes”

Stay away (avoid)
Kelly started calling Sharon names on the playground. Sharon decided that she’s had enough of the name calling, so she decided to turn around and walk in the other direction from Kelly. 

Role Plays

Students were divided into groups of 4 and were assigned one of the 5 strategies. They came up with a short role play of a situation where a kid used that strategy. While presenting to the class, the other groups had to figure out which topic each of the groups had chosen. 

Game Time!

This is an activity that I saw on lifelessonsforlittleones.com. There is a ship at the top of the board that has a teasing remark, "You're a little shrimp!". There are a lot of fish cards in a pile that have responses to that statement. If the statement is one that "bites" the hook, it is place on top of the baited hook/strings. If it is a statement that helps the fish avoid the hook, they are place on the side with "Free Fish".

Take Away!


At the end of the unit, each of the students received one of these cards to remind them of what they can do to avoid "biting the hook".

Other Activities: 

  • http://www.freekidscrafts.com/handprint_fishing_pole-e1236.html Give each kid a hand cutout, fishing pole, string, and two paper fish. Have kids write a teasing comment on the pole or hand cutout. On one of the fish, write a comment that would be considered "biting" the hook. Glue this fish to the string. On the other fish, write a comment that would represent the "free" fish. 


Thursday, February 14, 2013

Diversity Lesson- The Crayon Box that Talked Lesson

I taught a lesson on diversity to a class of PK/Kindergarten students.


Introduction:
Introducing the topic, I opened a box of crayons, grabbed a handful and laid them out in front of me on the floor so that everyone could see. Next, I asked students how these crayons are different. I got the expected responses: different colors, some are longer than others, some have paper and others don't, etc. I then asked the class how the crayons are the same. One kid said that all the crayons do the same thing. Another pointed out that they are all called "crayons". I added that the crayons all go back into the same box when we were through.

Story Time!
I then read the story, "The Crayon Box That Talked" by Shane DeRolf. This is a book about a box of crayons that do not get along with each other. In the story, a girl buys the box of crayons and takes them home to draw a picture using every single one of the colors in the box. By doing this, the crayons all start to realize that they each have something to give that is different from every other crayon in the box! We talked about what it meant to be "unique" and discussed how each student in this class is unique, just like this box of crayons. We talked about a few ways that we are different from one another, and about a few ways that we are the same as everyone else. 

Activity:
To really drive this message home, I told the class that we were going to make a puzzle as a class! I created a puzzle using a file folder and numbered each of the pieces to make putting it back together easier. (Plus, the kids can practice their counting skills!) I gave each student a piece of the puzzle to decorate with crayons however they would like. The teachers also helped color a piece.

Conclusion:
Once everyone was finished, I taped all of the pieces together. Each person's unique puzzle piece came together to create this beautiful class puzzle! No two puzzle pieces are alike, just like no two kids are alike. The class now has this puzzle displayed in their classroom to remind students that they are all unique! 


(Click the images below to be taken to my Teachers Pay Teachers store and purchase this lesson!)


Monday, January 21, 2013

Mr.Potato Head- classroom management

Introducing: Mr.Potato Head! I have used this as a visual for whole body listening. At start of a classroom guidance or small group lesson, discuss what ears, eyes, mouth, hands, brain (hat), and bottom should be doing, adding body parts as you discuss. If you notice that kids are not using their body appropriately during the group or class, remove that part of Mr.Potato head. Replace when you have everyone's attention again. 

At the end of class, if Mr.Potato Head has all of his parts, give the class a compliment when their teacher arrives to pick them up, or another agreed upon incentive. For smaller groups, you could pass around Mr.Potato Head at the end. 

(I believe the original Mr.Potato Head classroom management strategy came from here, but please correct me if I'm wrong!)
How would you use Mr.Potato Head?


(Inspiration for Mr.Potato Head from here)

Sunday, January 20, 2013

Empathy and Perspectives Lesson

I did a lesson with 4th graders on empathy and seeing a situation from another person's perspective. We discussed how two people in the same situation can see things completely different. 

To emphasize this point, I had two volunteers stand up and face each other, a few feet apart. I put a picture of a "6" in between them, and asked them to name the picture. One said it was a 6, the other said it was a 9. Then I asked the class: Who is right? How can both be right? 

The same thing applies in conflicts. Even if you know for sure that you are right, take a moment to consider why the other person also thinks that they are right. Is there another perspective?


Other ways to use concept is to use optical illusions such as this one: